Loading your Datamax E-4203 with Thermal
Transfer Ribbon and Labels
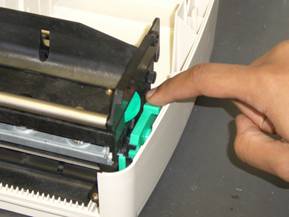
- Open the printhead by depressing the head-lock-lever. The printhead will open up and to the left.
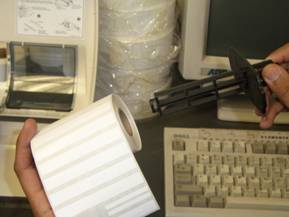
- Insert the label spindle through the roll of labels/tags. Labels should come off the front of the roll, with the spindle inserted from the right side.
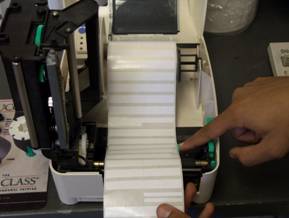
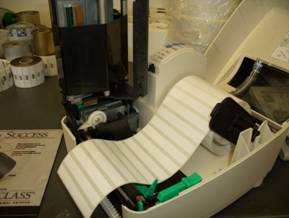
- Insert the roll in the printer, labels facing up. Labels should rest in the bottom of the printer, then come up and over the rubber roller and metal bar in the front. Adjust the green media guide up against the right edge of the labels.
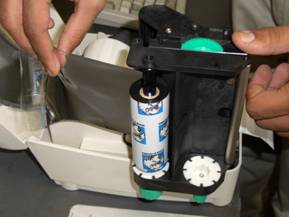
- Insert ribbon spindle through new roll of ribbon. Note how ribbon comes off the front of the roll, and spindle is inserted from the left hand side.
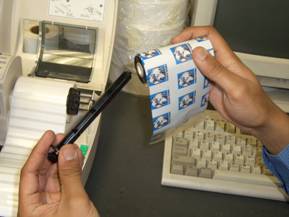
- Insert the loaded ribbon into the printhead. Pull the leader (silver foil) off the roll, and around the back, and then under the printhead mechanism.
- THIS IS INCORRECT!! This is a common mistake when loading ribbon, with the ribbon going around the sensor bar
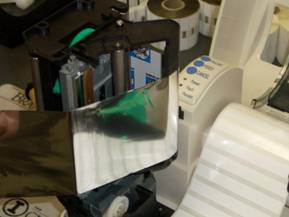
- THIS IS CORRECT. Note that the ribbon goes underneath the sensor bar without contacting it. The ribbon should touch the silver metal roller on the bottom of the head mechanism.
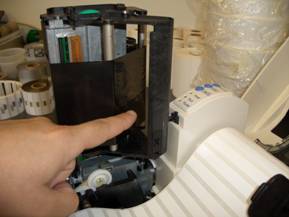
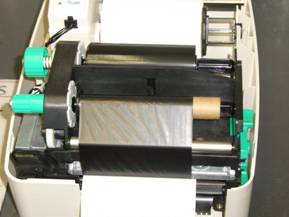
- Wrap the ribbon around the front of the head and tape the silver leader to the cardboard core of the other ribbon spindle. This picture shows what the printer looks like with the printhead open, and the labels and ribbon correctly loaded.
- With the labels and ribbon loaded, lower the printhead. The printhead should click into place, locking with the green locking lever. This picture shows the printer correctly loaded with labels and ribbon, with the printhead in the locked position. NOTE how labels and ribbon are loaded ALL THE WAY OVER TO THE LEFT.